While you’re in your comfort zone reading this article, you must be working from home, traveling, or sitting idle in an absurd posture, leading to fatigue or even major physio issues. One could probably be working out heavily or even indulging in vigorous sports activities, which could cause muscle soreness. While you could feel the pain, you must be craving a good massage. But, owning a massage chair or visiting a spa frequently is not feasible for everyone. You would wish for a portable massager, which could be a one-stop solution to all the physical beating your body takes on day-to-day life.
Considering all this, Hyperice has launched its latest percussion massage device called the Hypervolt Go. The brand had recently incited into the Indian market and shared one unit with us to fidget around with and get you a comprehensive review of the device. Before we unfurl more about it, for your information, the Hypervolt Go is a premium device and comes with a price tag of Rs 16,999.
There can be several reasons your body might feel sore right now, from sitting for long durations, working in front of the screen that’s not set to the correct height, and especially working out or any physical activity, which could take a toll on your body. But you no longer have to deal with the discomfort all day.
How Does the Hyperice Hypervolt Go function?
In reality, the Hypervolt Go is about the size of a small blow dryer and includes two attachments to use on the body as per comfort. You can toggle in between three vibrating speeds at the press of a button — the first speed being the least intense and the last one being the most intense percussive motion.
Level one is more than enough for anyone going through minor fatigue. Levels two and three are meant for those who face major back issues or undergo vigorous training or sports activities.
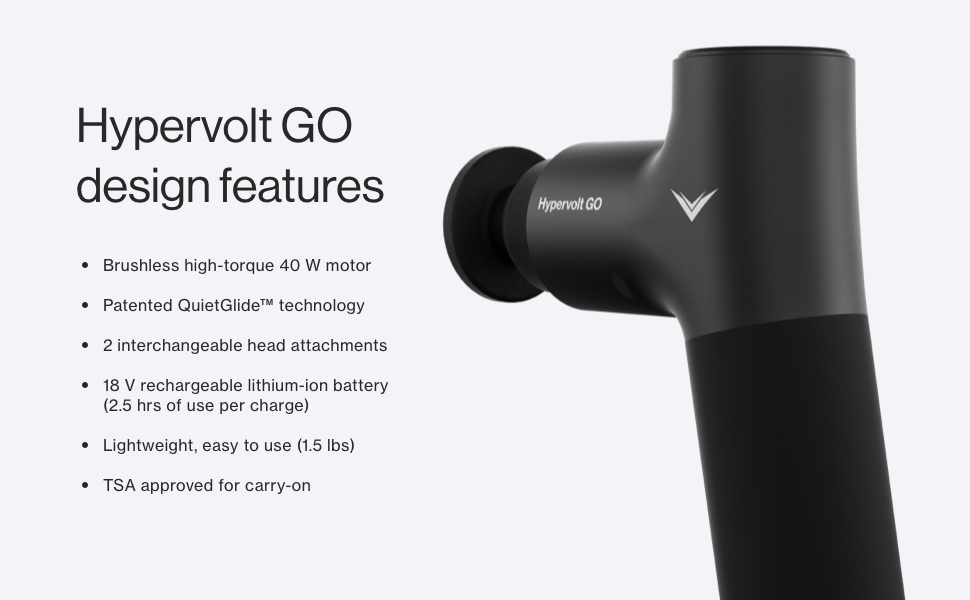
The Hypervolt Go comes with 2.5+ hours of battery life per charge which is pretty decent considering the amount of power that it packs within. The ultra-lightweight GO delivers up to 3,200 percussions per minute, which is all the power you need to relax, recover, and recharge.
According to the company, the new device is 30% smaller than the previous Hypervolt, with surprisingly more power and quieter operation and decreased vibration compared to the outgoing model.
It is relatively compact, and its ergonomic design helps it fit perfectly in your hands and efficiently in your bag so you can carry along some profound muscle-massaging relief with you anytime, anywhere. The Hypervolt Go is also equipped with a patented QuietGlide technology which results in a near-silent operation so that your work or play never stops.
What do you get with the Hyperice Hypervolt Go?
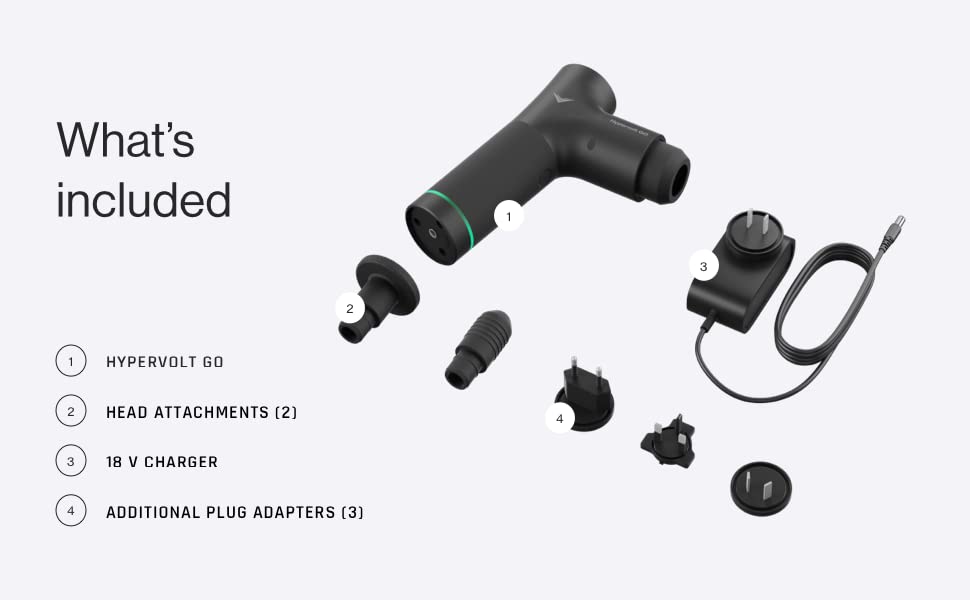
The package includes two head tips in the box with the Hypervolt Go. The attachments are designed for different areas, but they help cover any soreness you might feel on your body. Switching between the two head attachments couldn’t be easier — all you have to do is twist the head and pull it out of the Hypervolt Go.
One of the Hypervolt Go’s heads has a flatter surface, which the brand notes is ideal for more extensive areas like your chest, back or quads. We liked using the flat attachment on our lower back, especially on our stiff hamstrings, holding the Hypervolt Go in our hand and slowly applying pressure to the sore muscles with the head attachment until it felt like they loosened up.
On the other hand, the “Bullet” attachment is narrower with a rounded edge, and we used it on our shoulders and lower-back when stretching didn’t help. Thanks to QuietGlide tech, the Hypervolt Go is a very quiet gadget.
How to use the Hypervolt Go Massage Gun?
The Hyperice app can be downloaded on your smartphone, and it’s filled with valuable tips for using the Hypervolt Go.
We liked the app’s efficiency and the interface that allows you to search massage motions according to the parts of your body you want to use the Hypervolt on. The app shows you a clickable full-body illustration, both for the muscles on the front and back of your body, which makes it very handy to use.
Verdict
Now, here’s the bottom line: after a few weeks of usage, we think the Hypervolt Go is one of the best portable handheld tools you can use to ease muscle soreness right now. The brand’s app and a versatile assortment of attachments make it a worthy rechargeable recovery gadget for any situation, from fitness relief to targeting specific muscles by yourself. With this analysis, we have understood that the device is beneficial for people suffering from minor and major muscle issues. The Hyperice Hypervolt Go reduces muscle soreness and stiffness; it enhances muscle performance and accelerates recovery. If you’re a traveler, I must recommend this device as this can be a great relaxation therapy.
To add more icing to the cake, the Hypervolt Go now comes with an exciting price tag of Rs.16,999/- and with a set of 5 attachments.
Motorola Edge 30 Pro is a great successor to the Edge 20 Pro, which has been around for a while. The Edge 30 Pro is one of the most affordable Snapdragon 8 Gen 1 phones available in the market currently. As far as speed and fluidity are concerned, I don’t think any other phone comes close to this one.
Motorola has added a unique twist to Android called the MYUI, which is thoughtful customization added to the Edge 30 Pro to make things more useful and functional than they would have been in a plain stock Android.
Motorola Edge 30 Pro Detailed Specifications:-
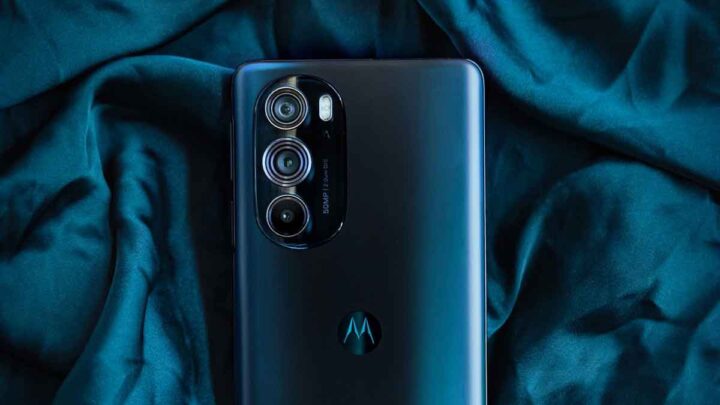
Motorola Edge 30 Pro offers an amazing look with a glass back and a matte finish and comes in a delightful Cosmos Blue colour. The smartphone features a 6.7 inch OLED display with a 144Hz refresh rate. The display is impressive with punchy colours to watch movies and play games. Edge 30 Pro has a set of decent speakers that don’t sound too squeaky and are loud enough with a good base.
Motorola Edge 30 Pro houses a 4,800mAh battery with 68W fast charging support. The phone also supports reverse charging. In about 40 minutes, the phone charges to its maximum and easily lasts for about 14 to 15 hours with regular usage. With less use, Edge 30 Pro would easily last for a day and a half.
Coming to the camera, Moto Edge 30 Pro features a 50-megapixel primary camera with OIS accompanied by another 50-megapixel wide-angle camera. The wide-angle camera also, surprisingly, doubles up as a macro camera. On the front, there is a 60 MP lens for selfies. I clicked some pictures, and the camera performed well during the daylight. The low light images could have been more impressive.
Gaming was a pretty smooth experience overall if we skip the fact that the phone did heat up a bit after half an hour. Still, I believe its a normalcy, and with this powerful chipset, it has got to heat up a bit.
Rear Camera: 50MP (f/1.8, OIS) + 50MP ultra-wide (114-degree FOV) with macro vision support + 2MP depth sensor
Rear Camera Video: 8K (24fps), 4K (up to 60fps)
Front Camera: 60MP (f/2.2)
Speakers: Stereo speakers( Dolby Atmos and Snapdragon Sound)
Battery and charging: 4,800mAh with 68W fast wired and 15W fast wireless charging
Verdict:-
Moto Edge 30 Pro has been priced at Rs 49,999 and is one of the most affordable Snapdragon 8 Gen 1 phones you can buy right now. If you are looking for an excellent performance smartphone with a good camera and gaming backup, you can opt for this smartphone.
Tablets are quite a complicated market since they are neither as compact as a smartphone nor as powerful as a laptop. However, a good tablet can give you a lot of flexibility in attending meetings, checking emails, and consuming content after a long day. And I believe here is where Lenovo Yoga Tab 11 comes into play with its impressive specs and great built.
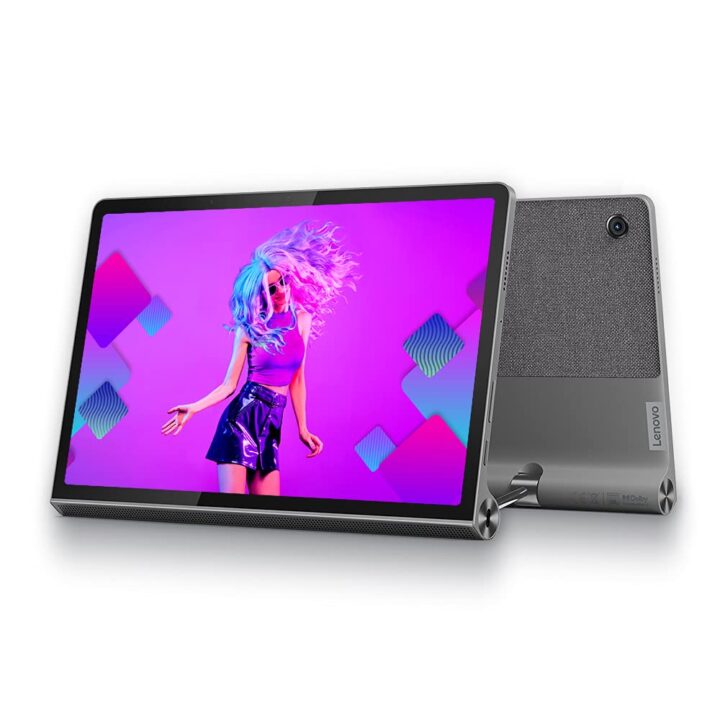
One of the most distinctive features of Yoga Tab 11 has to be its cylindrical battery which looks weird in the beginning but eventually grows on you. Another feature that makes the device exclusive is the built-in kickstand that makes the tablet more convenient to carry around or keep still.
Lenovo Yoga Tab 11 is small and lightweight and the back has a soft fabric that appears to be heat and sweat resistant. Tab 11 has an 11-inch multi-touch display with a 2K resolution and a refresh rate of 60Hz. It is a perfect size for watching movies, YouTube videos, or playing games. I played a few games such as COD and Asphalt and it was a delightful experience. The screen is responsive and accurate to touch but the tablet also supports the Lenovo Precision Pen 2, if you prefer to use a stylus.
The screen is bright and vibrant and achieves a maximum of 300 nits brightness. One thing I believe could have been improved was the refresh rate. 60Hz works just well enough but it still lacks the smooth 120Hz refresh rate that is provided in high-end tablets like Samsung Galaxy Tab S7 Plus.
Yoga Tab 11 is powered by a MediaTek Helio G90T Octa-core processor and 4GB of RAM power. It makes a remarkable device for gaming. Tab 11 has an incredible set of speakers. It could easily fill up the room and once you start watching content on it, you would never want to switch to your smartphone. It also has a dedicated Google Entertainment Space where everyone can create their own profiles and swipe through a collection of entertainment apps curated specifically for them.
Yoga Tab 11 has an 8MP camera, both at the front and at the back. It has an integrated 7500mAh battery and is advertised to last for 15 hours. My experience is somewhat similar. With very irregular usage, the tablet easily lasts for 2 complete days and with extensive use, it can last for up to 10 hours.
Verdict
Lenovo Yoga Tab 11 costs Rs 27,999 and this seems like a reasonable price for a tablet that has such exciting specifications. After using it for about a month, I would definitely recommend the device as a must-have in every household.
Today we have our hands on the new Logitech POP Keys Wireless Mechanical Keyboard With Emoji Keys and a matching mouse. It is available in three stunning colour combinations, Daydream, Blast, and Heartbreaker.
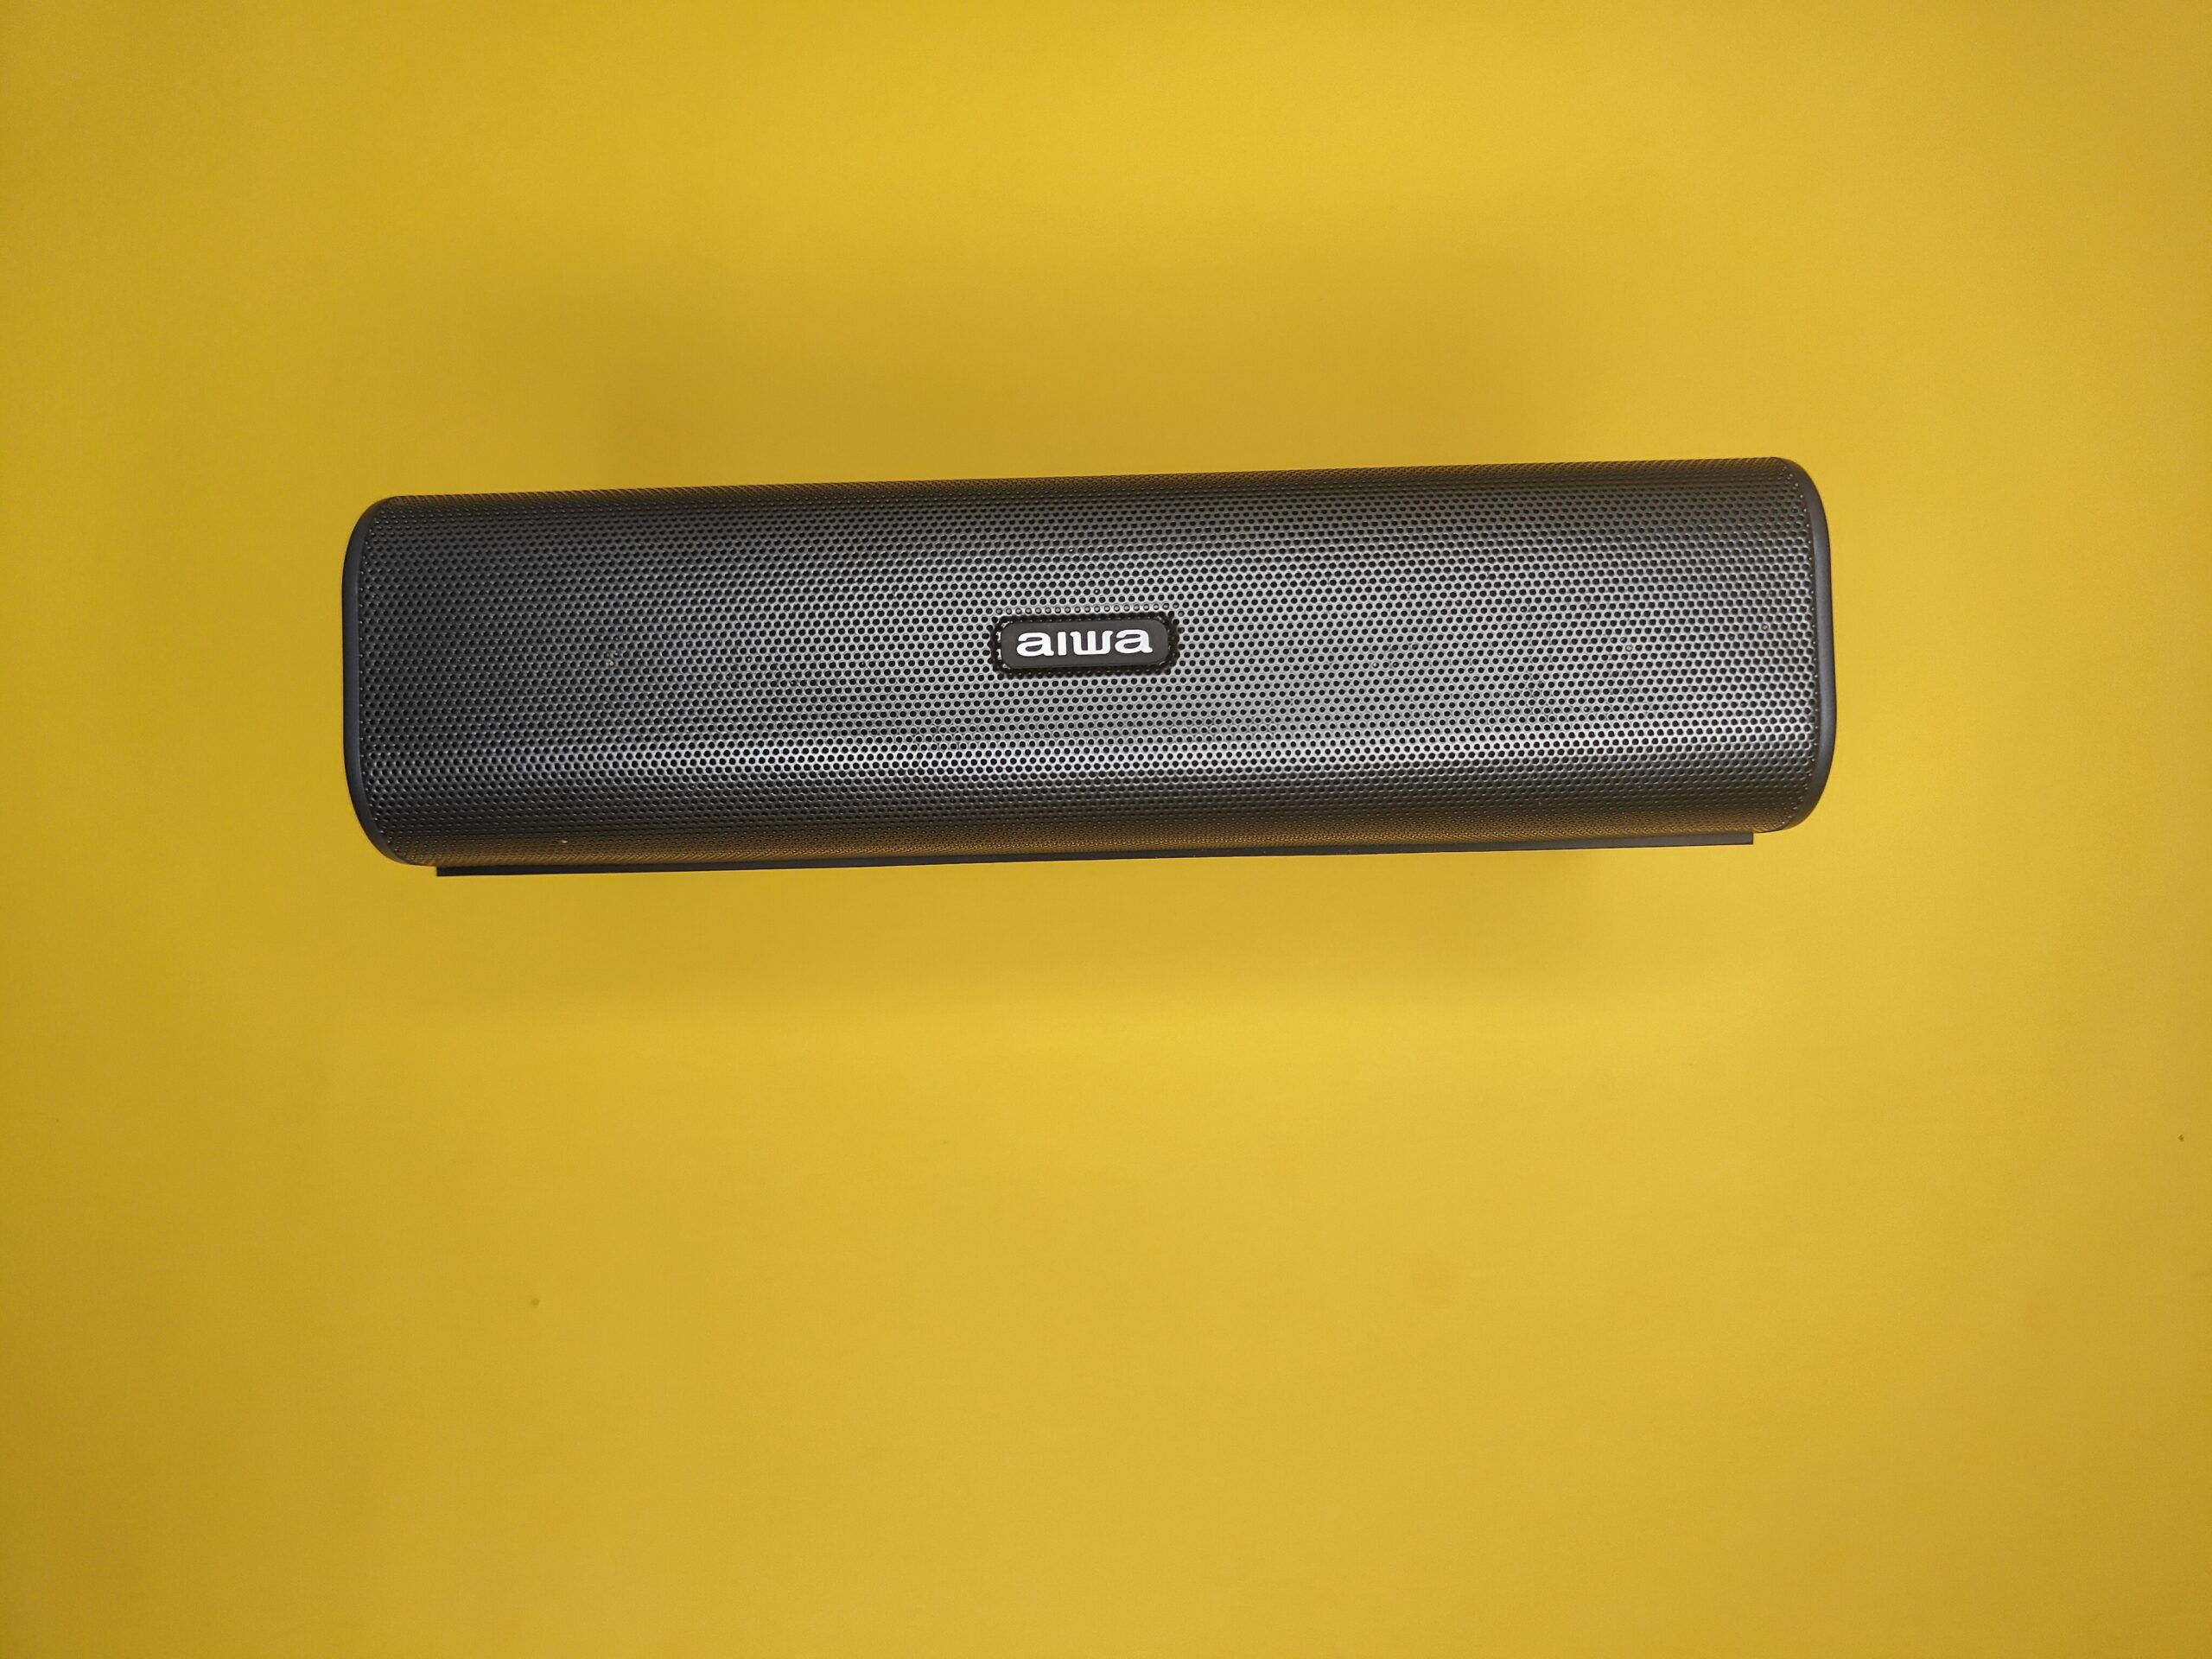
Aiwa is a Japanese brand known for its high-end luxurious audio gear. We got the AIWA SB-X350A desk speaker in the Exhibit office for review and I was delighted to do a review for this one.
With a 40W output and the support of Qualcomm AptX HD, the speaker manages to put its name up with high league brands such as Bose and Harman Kardon. Below are the technical specifications of the BlueTooth speaker.
The AIWA speaker looks like a rectangular lunchbox with the AIWA logo on the side. AIWA has used a combination of metals throughout the speaker but honestly, the speaker looks very bland. It does not have a design that could grab some attention instantly when you see it, but rather looks like a boring and non-futuristic design.
The midbass drivers appear to be at the top of the set so it is more likely to give the best high-frequency range when set at ear level. There are six buttons for every operation placed on the top with the on/off button first, followed by the mode, play/pause, call, and finally volume rockers.
The speaker weighs around 1KG which is a bit high considering the size. AIWA SB-X350A works quite satisfyingly with various genres of the screen. The speaker held well with heavy metal tracks and the bass guitar felt quite nicely.
Connectivity
Connectivity options on the AIWA SB-350A range from Wireless connectivity to 3.5mm AUX wired ones. There is a USB-C port situated at the back, which is primarily to charge the 8,000 mAh battery on the speaker. We get support for Bluetooth 5.0, although we would have appreciated options for microSD card slot and NFC pairing.
Battery Life
The AIWA desk speaker packs a set of dynamic drivers totaling an output of 40W. The treble, vocals, and bass feel balanced in SB-X350A. The speaker lasts for around 4-5 hours on playback with high volume levels. With the supplied charger brick, the speaker took close to 4 hours to fully charge the 8,000 mAh battery.
Conclusion
The AIWA SB-X350A is priced at Rs 19,900 and you can get it for a discount on Amazon. It is a pretty decent catch for this price but I would like it better if it was less bulky.
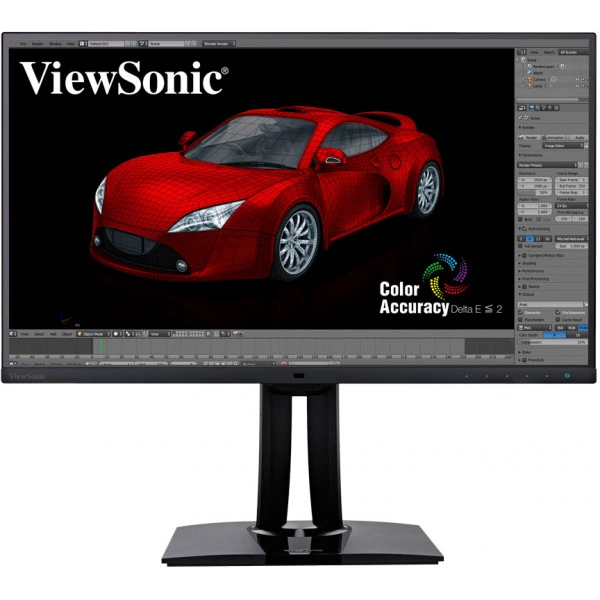
Viewsonic has been a known and respected name in the monitor domain and I had the pleasure to use their wide-gamut VP2785-4K monitor for a month so I noted a few things after rigorous use.
When you are all up for creating content, 4K is the resolution of choice. This one is a thin-bezel 27-inch monitor with a high-quality IPS panel. It is a prime-pick monitor for photographers, video-editors, packing great color accuracy and calibration. There is absolutely no bleeding when viewing a dark screen at typical brightness levels.
The monitor has a contrast ratio of 1,000:1, a brightness of 350 cd/m², 99 per cent AdobeRGB, and 96% DCI-P3 color coverage making it ideal for digital cinema content and photography.
The colors came out to be nice and punchy and I got to taste some rich and vibrant colors. However, when you are sitting a few feet away from the monitor, the angle to the corners appear brighter. The good thing is, it’s only visible when you are looking for it.
Viewsonic offers a nice utility and a well-rounded professional monitor with this one. The bezel around the screen is just a thin 1mm line, with a 1.5cm panel along the bottom to frame the control buttons and ambient light sensor. There is also an automatic brightness adjustment feature to make working more comfortable as lights change. It also offers a color uniformity feature that intends to keeps colors consistent across the screen. The frameless design provides a seamless viewing experience in a multi-monitor setup.
The mount is simple, sturdy, and ergonomically friendly, providing height, tilt, swivel, and pivot adjustment. Connections include four USB 3 ports, one USB-C port, two HDMI 2.0 ports, DisplayPort and mini-DisplayPort inputs, and two 3.5mm audio jacks (one audio-in and one audio-out). It provides Windows and Mac OS system users with user-friendly management of 60W power charging, large-quantity data transmission, and video display.
The monitor is capable of displaying multiple sources at once. So if you have a computer plugged into the Display Port, you could also plug in your TV box or another laptop using HDMI, mini-display or USB-C and then have all sources shown on the monitor. You can also have the same source displayed twice but each with a different profile. For example, one could be shown in AdobeRGB and the other would use the iPhone color profile. This functionality allows photographers and designers to simultaneously view and edit images while using separate color settings, virtually combining the work of two monitors into one.
The screen can also be pivoted to 90 degrees for photographers and editors to work in portrait orientation. Auto Pivot mode allows photos to automatically adjust to the screen’s orientation when pivoted.
The VP2785-4K offers 4K UHD resolution to its 27-inch screen, for a high pixel density of 163 pixels per inch.
Conclusion
Viewsonic VP2785 cost around Rs 1,14,300 and can be discounted at a much lower price on some 3rd party platforms, and you can consider buying it to match neatly with your workflow and needs.
One thing is for sure – these Active Noise Canceling true wireless earbuds aren’t going to attract a lot of ears due to their price range but are surely going to charm their way to luxury.
The Devialet case manages to draw your attention from the very start with its ‘flip and open’ architecture. The signature design looks reasonably distinct and premium.
Devialet Gemini Fitting
The earbuds offer a large oval shape which I guess is to maintain a strong noise-isolating presence. The outer part has a distinctive metal alloy sheen to it with the touch control imprinted on the Devialet logo. The Gemini wireless earbuds reflect the Ear Active Matching which adapts the sound to your ears and tell you if you have the right silicone plugs on.
Overall, it was a snuggly fit for me, but to some, it can be a bit loose and it’s understandable considering the shape of the earbuds. Although you get four different sizes, from XS to L, you might find one that fits just right on you.
Devialet Gemini Features
Gemini’s ANC is just at par. It is based on the company’s proprietary Pressure Balanced Architecture (PBA), which also integrates Devialet’s Internal Delay Compensation (IDC) tech. To explain it simply, the PBA technology uses vents that allow air within the ear canal to flow outwards while also stopping external noise from penetrating through, optimizing low-end frequencies.
Honestly, when you put these earbuds on, the world takes a backseat. Vehicles glide past, commutes are quieter, voices are rendered more intelligible.
The Transparency Mode with its high and low options gives you a sense of what’s around you. Music still sounds nice, loud, and clear.
Devialet Gemini Sound Quality
When it comes to sound, Devialet never fails to impress. The sound in Gemini is lifelike and extremely detailed. You can hear the vibrations and instruments playing in the background quite clearly. The notes do not diffuse into each other and manage to sync well. The amplifier is a bit weak but the bass! the bass steals away the thunder.
Mobile calls through Gemini work pretty much fine. There are many other earbuds with a louder sound, but what bugs me is that they have higher distortion, sharper midrange, and a more closed treble than Gemini.
Devialet Gemini App
The Devialet Gemini app is purely magic! You can easily choose between different presets of sound or make your own using a six-band graphic equalizer. Through the app, you can also decide whether you want the double-tap to activate the voice assistant or start the previous or next track.
You can also select up to three degrees of noise reduction(low, mid, and high) and two degrees of sound penetration(low and high), or you can select neutral to deactivate it all.
Conclusion
Devialet’s wireless earbuds are good ones but not enough for the price that it has to offer. Gemini costs around 32,000 which are considered high considering the features that we get here. Other brands such as Bose and Sony set a different bar altogether that Devialet fails to reach.
Overall, I would definitely recommend buying these if you are up for luxury tech.
Good sound or good music has the ability to delight your soul. A good audio system in your car is pure eargasm while on the move. If you’re new to the world of car audio systems, check out our article on how the in-car infotainment system evolved with time here and they seem to have become more sophisticated with each passing year.
Almost everyone has different opinions on car audio systems, and some people love the look of their factory stereo. If you have a late model car with an integrated infotainment system, upgrading the stereo can be difficult. In either case, there are several ways to improve a factory sound system.
One interesting thing about upgrading your car audio is that there’s no right way or wrong way to go about it, in fact, the best thing about upgrading factory audio systems is that almost any component you replace will at least represent a marginal improvement.
The guide to “car audio” starts with an understanding of what each component contributes to the overall audio experience you have. But it’s important to be able to identify the pitfalls that you notice in your car audio, then know the right fix for each problem.
However, no matter how many complexities arise in the technological aspect, a car audio system only has three basic components. So if you’re considering upgrading your car’s audio system, keep in mind that the components listed below are the ones you must include.
If you are going by the budget-conscious piecemeal route, then you must plan on how you want the final system to look and sound like. If you do that, you’ll end up with components that work pretty well together.
There are many options when you build a car infotainment system from the ground up, so people who have never performed this task may shy away from that sort of drastic change.
Now, if you dive in, consider the types of features you want your car to sound like.
If you’re working on a tight budget, you can do some things to improve the sound quality. You can even replace components one at a time, depending on what your speculated budget permits, and eventually, you’ll have a completely custom car sound system.
Know the main components!
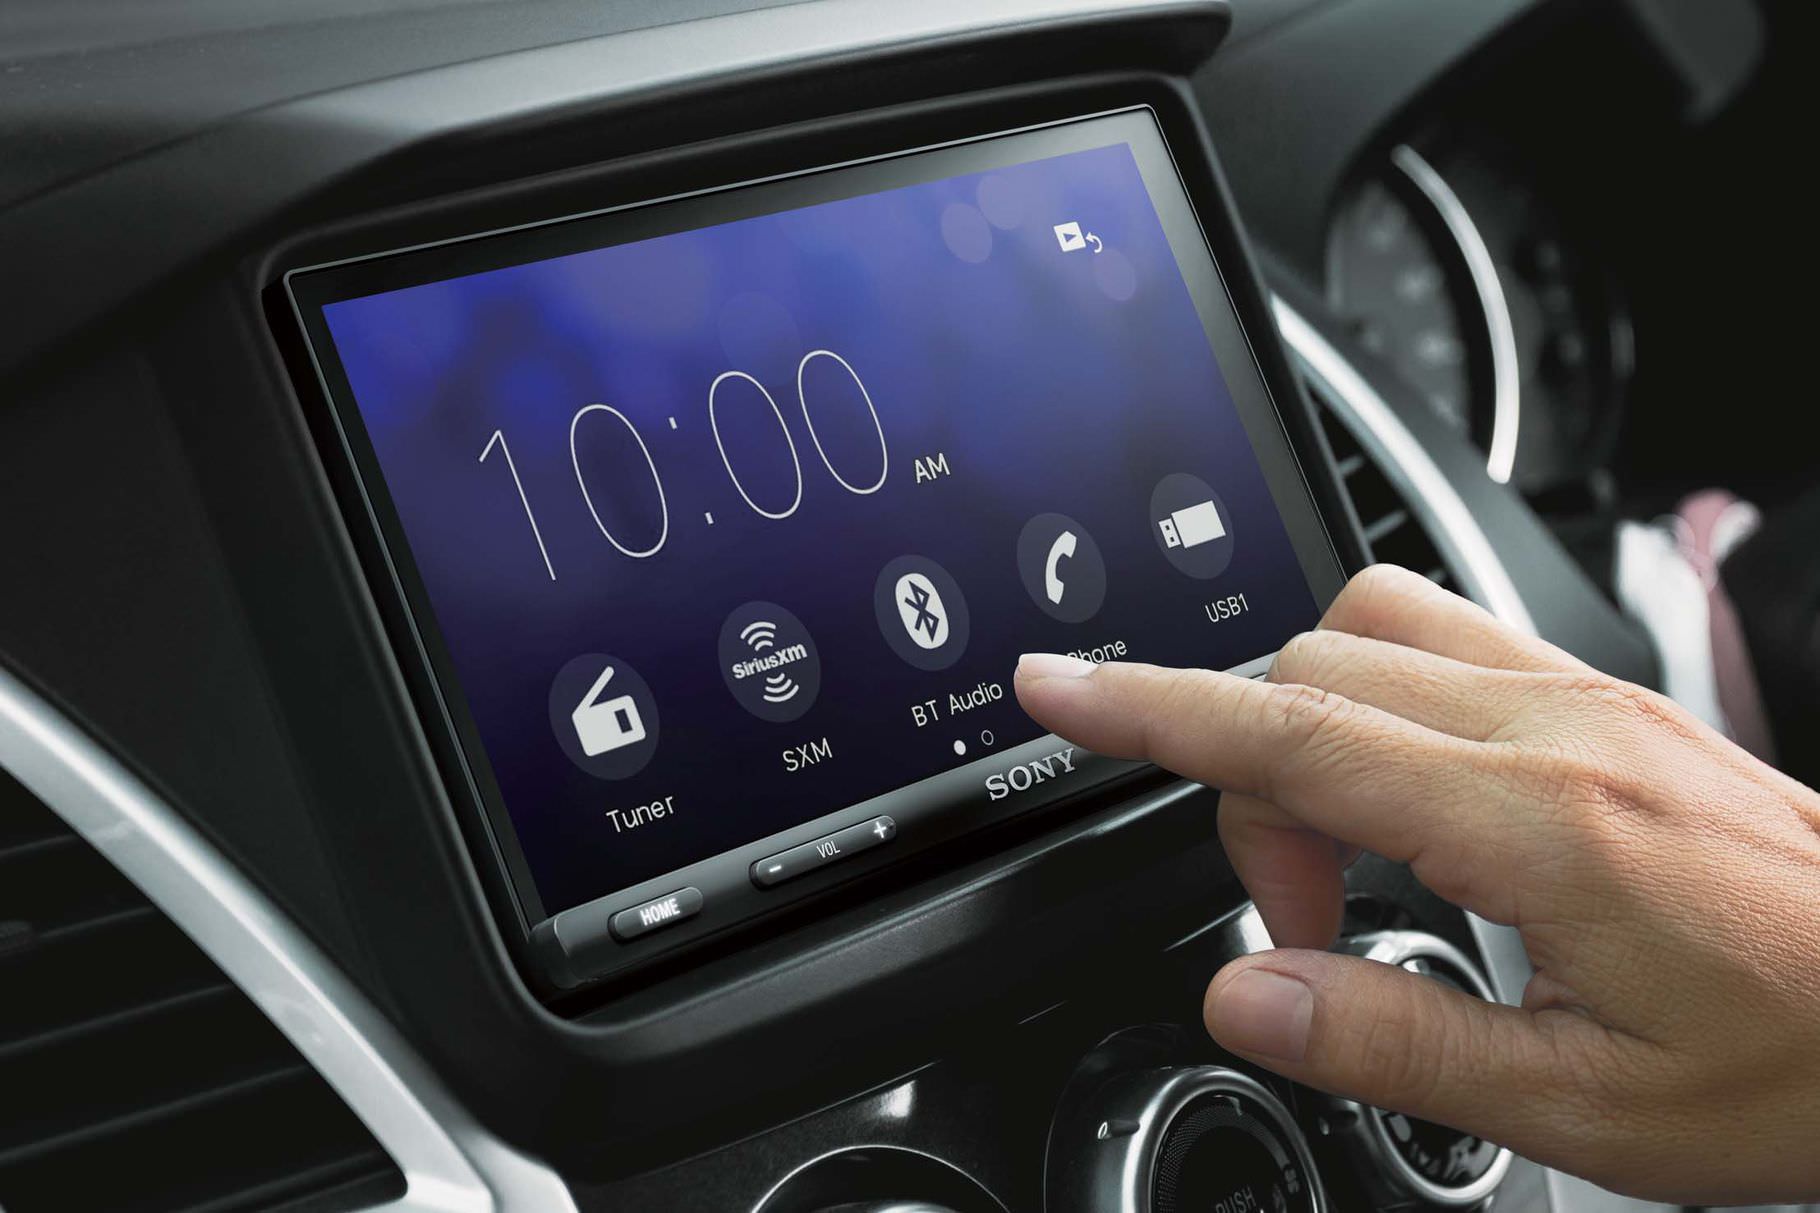
Head Units
This is the brain behind everything. In the beginning, head units were simply radio tuners which, as time went by, became proficient in providing audio signals from cassette tapes and CD players. In the modern-day vehicles, the head unit is often integrated into its entire “infotainment system”, which is the central console that also often houses climate controls and provides navigation.
Today, most head units have USB ports, Bluetooth connectivity, Apple CarPlay, Android Auto, etc to connect other devices and play digital music, built-in satellite and Internet capabilities, and whatnot.
Now it is entirely up to you what you want in your car.
Either way, we advise you to end up with a head unit that is capable of powering the speakers. You can also go for a head unit with pre-amp outputs and an amplifier capable of fully powering the speakers.
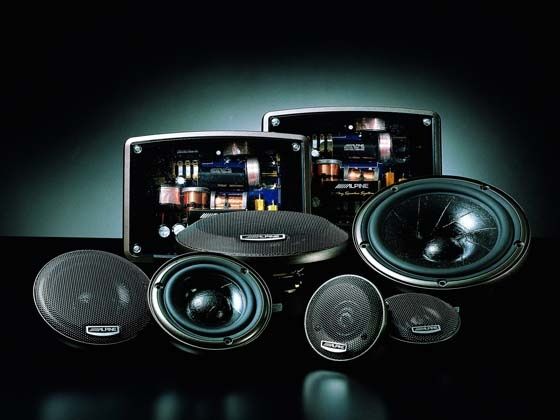
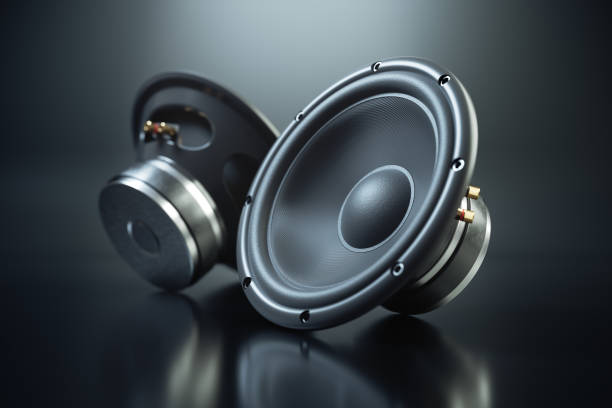
Speakers
It’s an old rule of thumb, but it remains true: even the best car stereo won’t sound great on lousy speakers. If your car’s stock car audio system shows distortion, lacks clarity during high-frequency ranges, and blasts hollow bass notes, you may improve the sound system in your vehicle with a worthwhile speaker upgrade.
If your car only has two or four-speaker slots, they are probably coaxial speakers, which means a single speaker head features both the woofer and a tweeter. The easiest way to replace them is with better coaxial speakers, preferably made with more superior materials.
A decent set of front speakers might only set you back less than ten grand. Component speakers provide even better sound, but that’s a complicated upgrade that’s better paired with a new car stereo.
Discrete speaker components sound even better because the tweeters and woofers operate separately, producing greater sound clarity. But this upgrade often requires cutting new speaker mounts, complex rewiring, and other actions best performed by a technician, an experienced installer of sound systems for cars.
At least four speakers make up most car audio systems, although you can play with various configurations that will allow you to add more.
There are several types of speakers, including coaxial, component, and subwoofers. A coaxial speaker is one unit that houses both the tweeter, which takes care of the treble or higher range notes and the woofer, which deals with the Bass or the lower to mid-range frequencies. On the other hand, component speakers are simply a set of speakers that separate the woofer and the tweeters. Subwoofers, meanwhile, are designed to reproduce Bass and sub-bass that is typically lower than what a woofer can generate.
More often than not, car owners prefer upgrading the speakers that come with their car because its sound quality is often poor. Go for speakers that are constructed better and are usually made of cloth and foam. Some excellent speakers have rubber, metal, silk, and other synthetic materials. Car owners can enjoy full-bodied Bass, pristine sound in high-frequency ranges, and a lack of distortion with these speakers.
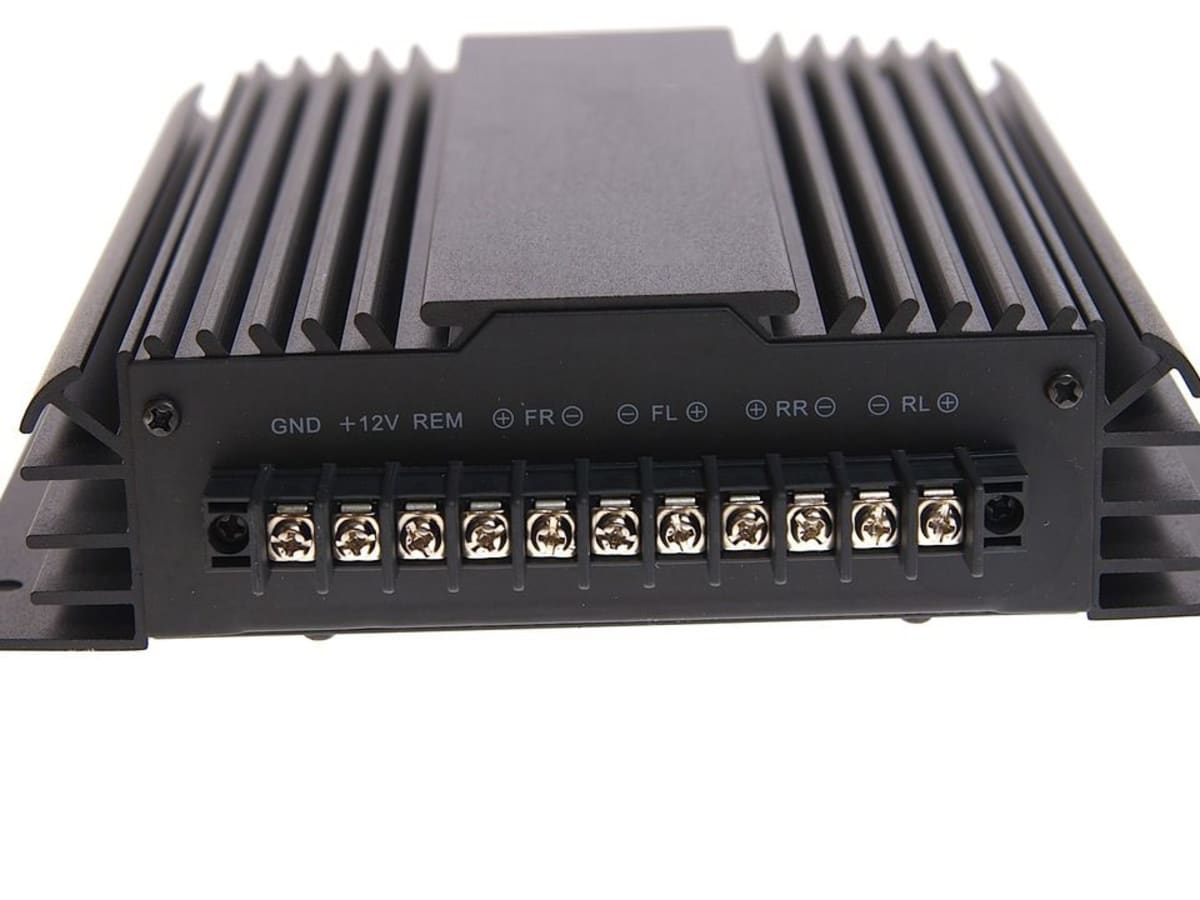
Amplifiers
Turning up the volume.
If you’re concerned about high volume, an amplifier is still an essential component you need to add to your system. You’ll probably need an amp with speaker-level inputs if you’re leaving the factory stereo in place, but some premium factory fitted head units come with line-level outputs.
It’s easy to overpower the speakers when you add a powerful amplifier to a factory sound system. With that in mind, consider upgrading the speakers first if you want to crank up the volume all the way blasting out of the windows.
As mentioned above, the speakers receive the audio signal from the amplifier and serve as the output devices that in turn convert the electrical energy of that signal into sound.
Despite what we said above about having great speakers, it’s also quite true that great speakers only sound as good as their amplifier. You may get an uplift in quality with new speakers alone. Still, discrete car audio systems will require more sophisticated amplifiers that can output to multiple, distinct speaker channels. A good amp can output well to tweeters and woofers, for example, and even subwoofers, for that matter.
An amplifier does precisely what its name implies; it takes the audio signal that the head unit sends out and amplifies it on its way to the speakers. Not only does an amplifier increase the power of that audio signal from the head unit, but it also improves the quality of the sound. With speakers hooked up to an amplifier, you should be able to turn up the volume without it producing crackling sounds and distorting the audio quality. The sound is cleaner, more unmistakable, all making your listening experience much much better.
Not all amplifiers are created equal, though, so you can vastly improve your car audio by simply upgrading your amplifier to superior ones.
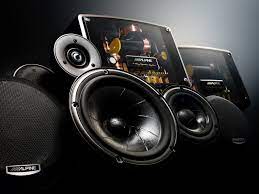
Adding more Bass
If the only thing you’re missing is Bass, add a subwoofer to your factory system in either of the two ways:
Add an amplifier and a subwoofer.
Add a powered subwoofer. Subwoofer in a car trunk
Powered subwoofers are a more straightforward proposition, but adding an amplifier and a subwoofer allows you more flexibility. Either way, a subwoofer is the best way to get that bass thumping.
If you want to go by the easiest way to add more bass to your car audio system, a powered amplifier with speaker-level inputs is the way to go. These units combine an amplifier and a subwoofer into one unit, and they can be hooked up to any factory or aftermarket head unit.
Doing it right
The most important thing to look for is a good wiring harness specifically designed for your vehicle requirements. This harness plugs into the factory wiring, so you won’t have to cut into any of your car stereo system wires and mess up with the electricals.
Some of these wiring harnesses are even designed to plug into a new head unit altogether, which means there’s no wiring involved at all. This is the easiest way to install a new head unit, and it ensures that you can pop the factory stereo back to stock any time you want.
What Does Your System Lack?
While many other components can affect the overall audio quality, those are the top three pieces of every car audio system. Now, consider the fact that your vehicle’s sound isn’t up to your expectations. What complaints do you have?
Your Speakers Buzz
Factory-installed speakers aren’t of the best quality, but you can easily upgrade to an aftermarket set that provides a broader range of sound. If you want an upgrade, particularly in the speaker department, install a separate woofer and tweeters along with component speakers for a good midrange sound.
There Is Not Enough Power
If the sound quality simply feels like it could need more “oomph”, your amplifier is likely the culprit in this scenario. Since it delivers more power to your new speakers, you should get more clarity without any kind of distortion.
There Isn’t Enough Detail.
If you’re a music-head audiophile, you know that layers of audio are very much essential to the full sound experience. An upgraded head unit could help enhance your jazz or classical listening, taking your hearing experience to another level.
Evaluating Your Car Audio System
If your car stereo sounds OK to you, that’s exactly what all the OEMs are looking for. Even factory-installed premium sound systems usually aren’t up to mark. So how can you tell if your factory audio needs a little tender loving care?
Here’s a test that anyone can do:
Sit in your car and close all the doors and windows.
Play your favourite music and turn up the volume.
Don’t be afraid to go higher than you usually would, but try avoiding blasting the sound and go blow-out-your-eardrums high.
Listen to the music and start noticing the drawbacks.
If you need to turn up the treble due to lack of clarity, that’s something that a speaker upgrade can fix.
If you turn up the bass figure, you have the Bass sounding hollow or empty, that’s also something an upgrade can fix.
If the music sounds distorted when the volume is up really high, that’s another thing you can take care of with a bit of tinkering with the amplifying system mentioned.
So, where do you start from? There are different ways to dig into a factory sound system upgrade. Answering a handful of questions can set you on the right path:
How important is your budget? Do you have much money to spend on upgrades?
Do you want to improve the sound while keeping your factory stereo?
Would you instead ditch the factory stereo and start fresh?
How important is Bass?
Do you like listening to your music loud?
You might be surprised at how the simple act of pondering those five questions sets you on the road to building a great car audio system.
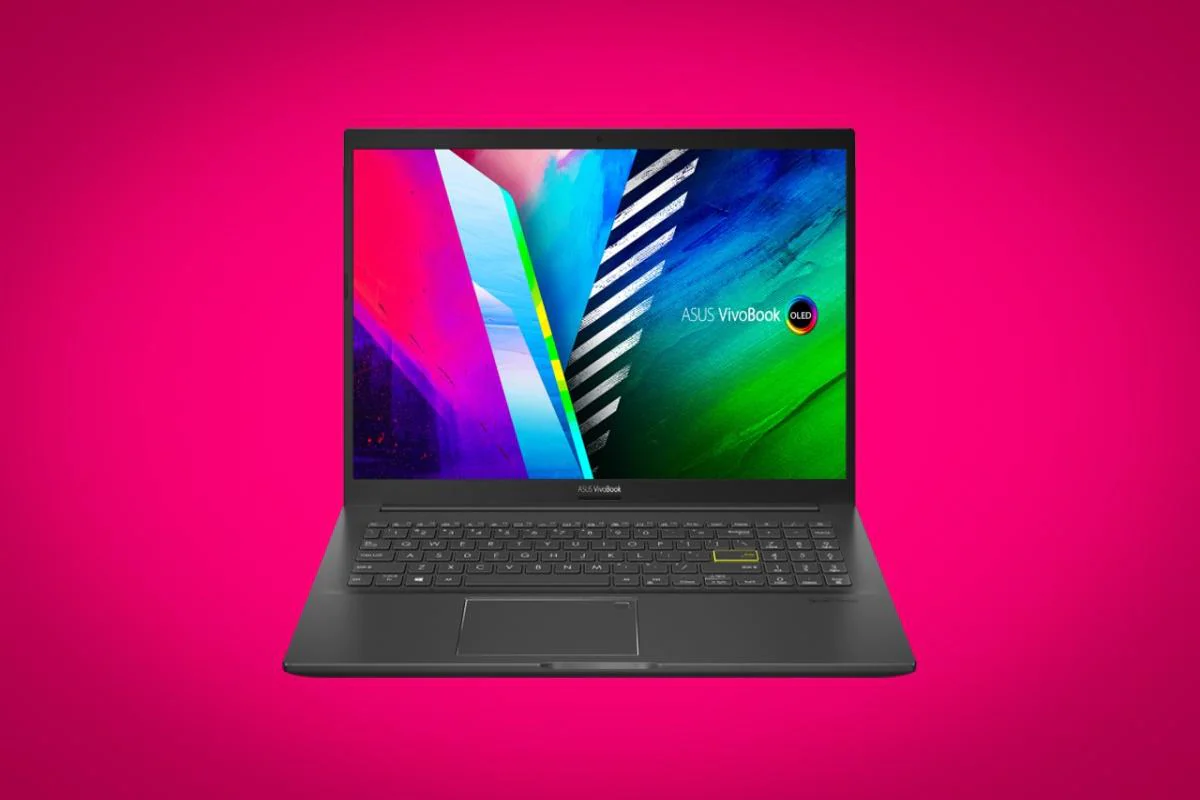
Vivibook series from ASUS has always been a budget-oriented device and something you can look forward to if you are considering buying a mid-range laptop. The price for the VivoBook series starts somewhere at Rs 47,000 and goes all the way up to 80,000.
The laptop I am currently testing is the Vivobook 15 K513EA, a CORE i5, 11th Gen device. The overall build of this machine is pretty decent. The top has a nice grey fibre finish with a clean ASUS branding on the right-hand side. On one side, you have two USB 3.0 ports and a battery charging indicator, and on the other, you have a proprietary DC port, an HDMI port, another USB 3.0 port, a USB C port just beneath that, a headphone jack, and finally a Micro SD card reader. At the bottom, you’ll see four rubber stands to let your laptop breathe easily. On either side, a speaker gives you a loud, clear sound.
VivoBook 15 comes with Xe graphics, 16GB of RAM, 256GB SSD storage, and 1TB of HDD storage. It has a big 15.6 inch OLED display at an FHD resolution. It has enough RAM to hold multiple chrome tabs at once without giving that irritating lag. It makes for a fantastic laptop for regular office bees and students whose workloads wouldn’t stress the machine.
I like the OLED display of this laptop, which makes the overall experience better and brighter. Even a bad OLED display looks good to an untrained eye, but this one is just plain gorgeous! The maximum brightness at around 404 nits gives a practical outdoor experience.
The charging for VivoBook 15 goes from 0 to 100 in about 45 minutes and lasts for almost a full day when used rigorously. I have tried playing a few games on this machine and it ran quite smoothly until the machine started to overheat. Overall, it is compatible with low-res gaming but definitely wouldn’t make up for a proper gaming laptop, which is fine for a mid-range laptop.
I have the Intel Core i5 + 16 GB RAM + 256 GB SSD + 1 TB HDD model that goes for Rs 68,990, and my final verdict is that I found the machine easy to use for everyday use.
To start with, I do not particularly like the hardened cable that stays in one place, but I was pretty surprised by how well Sennheiser 300 sits on my ears. After trying these earphones on, I would not like to change a thing about them, except a few, which we will talk about shortly.
IE 300 has a decent treble response if we talk about the sound signature, but the bass response on these is pretty sick! Infact, bass response is the standout feature of this device and has a very strange texture. You usually get to hear two types of bass responses in headphones. One is similar to the natural bass sound, like an ample drum space being hot by a large stick, and the other is an electronic one, which is artificial but more powerful. IE 300 has a more natural texture to it but is supremely strong. I recommend buying it if you have an ear for the particular tuning.
Remember that these earphones cost around Rs 30,000 and is not for a regular headphone user. The device is specially designed for audiophiles who give music their all. Inside the box, you get different sets of earphone tips – silicon, foam and E types; and a soft case for keeping your earphones safe. These earphones are much more expensive than the entry-level ones but promise an experience that capitalises on the benefits of high-resolution audio streaming.
The body is completely made up of plastic, with each earpiece weighing around 4gms. The included hard cable is detachable, uses a standard MMCX connector, and has a 3.5 mm plug for the incoming audio signal.
I like these earphones because they give gentle, cheerful beats, and the vocals and instruments all sound distinct and full-bodied. I could listen to all the elements in track as it was meant to be heard.
However, the downer for IE 300 is that it lacks the microphone feature. If you receive a call when your earphones are plugged in, you’ll probably have to plug it out.