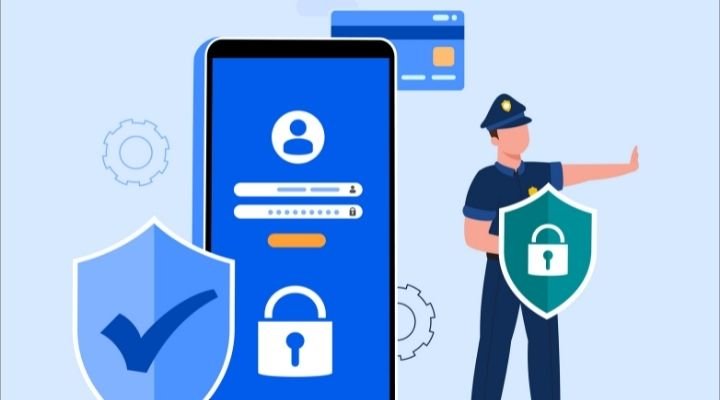
How To Keep Your Android Smartphone Safe & Secure?

Android is packed with powerful and effective security features, but many features are out of the way but reasonably deserves your attention. Recently, several tech experts, politicians and media houses expressed deep concern over the Pegasus phone tapping, which grabbed users attention and created a panic wave of mobile spying. 

Fortunately, spying tools like Pegasus will not spend time tapping ordinary peoples phones, but several other hacking and spying software might do the needful, and that’s the reason we have come up with the 7 valuable tips to keep your Android smartphones safe and secure. 

Lock your phone:

One of the first and foremost ways to keep your smartphone safe and secure is by locking the phone with a PIN or a pattern. We know it’s an old piece of advice, but still, many users don’t care about it. If you keep your phone unlocked and lose it to some snatcher, you’re more likely to get into trouble as these guys can use your personal information and credit cards like their own. There are various options available to lock your phone, but we recommend PIN as all the remaining options can be hacked easily compared to pin codes.

Two-factor authentication (2FA):

Two-factor authentication is technically a Google account feature, but it provides an outstanding level of security to Android smartphones. The feature adds an extra layer of protection to your account and prevents others from logging into your account, even if you’ve accidentally saved your password in their system or phones. 

Nowadays, single-factor authentication doesn’t provide reasonable security, and for hackers, it’s straightforward to crack it. When you activate two-factor authentication, it not only asks for a password but also asks you to prove your identity with a unique verification code that’s sent to your phone to go further.

Route to turn on the two-factor authentication: 

Settings > Google > Google Account > Security > Signing in to Google > 2-Step Verification

Keep your location to yourselves:

Every other app requests for your location when you install them or when you’re using them and provides three options for you, allow permission all the time, allow when using the app and never allow. We understand that some apps can not work precisely without having access to the location, but if some app requests access to a location in the background, even if it’s not related to the app’s core functionality, you should not allow the location permission to the app and consider looking for an alternative app.

Use VPN Provider:

We’ve stopped our outdoor adventures for a while now, but soon we’ll go out for vacations/holidays like we used to do in the past. Some of us still do a lot of travelling due to our work needs, and whenever we’re out somewhere, we always look for a Wi-Fi network, whether we’re entering a coffee shop or an airport sitting area but have you ever thought about the internet privacy? 

Well, now that you’ve warned about it, use a VPN on your smartphone whenever you’re using an unknown Wi-Fi as they attach an additional security layer to your internet connection. Also, encrypting the internet connection is always the best way to keep your device secure. ExpressVPN, NordVPN, PrivateInternetAccess, PrivateVPN and TorGuard are a few of the trustworthy and reliable VPN providers.

App Permissions:

Android apps can never access your data or any part of your phone unless you explicitly permit them to do so. Whenever you install a new app, along with the location, some of the apps ask for permission to access your camera, contacts, call logs, calendar, messages, and media. Now, you should understand why a gaming app needs access to your call logs or calendar? 

You can not undo what has already happened, but you can stay alert in the future before allowing these apps permission to do unnecessary sections. Whenever you’re free, follow the below route and turn off the unnecessary permissions to ensure future privacy. It’ll surely take time but do it now to avoid the upcoming glitch.

Route to turn on the two-factor authentication: 

Settings > Privacy > Permission Manager

Choose the section where you want to update the permission, tap on it and click on the app’s name to allow or deny the access.

Never allow your smartphone to save passwords:

Whenever our smartphones ask for permission to save passwords, we often let them save because it saves time, and we don’t want to type the password after every visit. Though the practice is beneficial for us, at the same time, it raises concern over our Android phone security. Along with not allowing your smartphones to save passwords, you should not use the same password for everything. Instead, use a different password for every app/site, and to set yourself free from remembering all of them, use password managers like LastPass, 1Password, and Dashlane.

Do not download apps from third-party stores:

Android phones have their native store, Google Playstore, which lets users download apps securely. The vast majority of Android malware and viruses enter your phones when you use third-party stores to download apps, which provides easy access to your smartphones for hackers. Also, avoid using unauthentic apps as they might be bogus and use trustworthy anti-virus software to increase your Android security. Anti-viruses help resolve your Android security issues, such as finding malware or a bug in a smartphone, and they also provide an added security layer over Google Play Protect.
Boost Your Business With SaaS

The main question is that How does SaaS help to boost the business?

SaaS offers several advantages to its clients, including the decreased forthright expenses of business software, the need to introduce programming on singular machines, administration versatility with a business’ development, reconciliations with other software’s, and moment updates to all clients. That is only a couple of the advantages. One of the significant advantages is that the product never leaves date. Along these lines, there is no expected hold-up too.

Still, wondering whether to implement SaaS into your business or not? Below, we’ve outlined several  ways SaaS can boost business productivity

1)It Automates manual tasks-

one of your requirements is to save time and increment your group’s efficiency, picking SaaS programming to robotize undertakings can go far in smoothing out work processes, empowering your representatives to deal with the most time-basic errands and tasks.

The less time they spend on doing manual, redundant undertakings, for example, administrator work and messaging, the additional time they can spend getting things done to build business development and meet your organization’s objectives.

Regardless of whether you need to robotize the formation of vanity numbers for business or your information passage frameworks, SaaS can save time for your representatives to zero in on what’s generally significant. This permits them to put their abilities to use instead of squandering their ability on monotonous, manual errands that detract from their enthusiasm instead of terminating them up.

2)It improves teamwork and communication


You may quickly improve your team’s communication and collaboration by using a SaaS product that uses cloud communications or a cloud contact center. The way business functions have changed since the epidemic, with hybrid and remote employment becoming a popular option for many.

This affects interchanges inside the group since actual gatherings and office culture have been pushed aside. With SaaS, notwithstanding, organizations can keep their group associated and encourage cooperation through various stages that give correspondences on the cloud and a wide assortment of virtual gathering instruments.

3) it makes business scalable to any size

The beauty of SaaS is that it is easily scalable and can adapt to your changing company environment and support expansion. This means you’ll be able to give existing and new employees access to more features and tools from any SaaS platform you choose

Because SaaS is scalable, it can readily connect with any of your objectives, from content marketing to client retention. Depending on the service you choose, you’ll be able to expand your business’s capabilities without having to invest in costly gear.

4) It Separates storehouses


If you choose to pick a SaaS item that consolidates cloud correspondences and video programming into its frameworks, not exclusively can you encourage correspondence, yet you’ll better separate division and information storehouses.

the data isn’t new – it’s been around since business initially started, yet the beginning of distance and a half and half work has brought worker efficiency and commitment under more danger than previously

The divide between the front office and back office has widened as teams have become physically separated, resulting in lower levels of interaction and participation.

Your staff will be less engaged and involved if there are more silos. This could take the form of one department being unable to effectively interact with another due to a lack of knowledge about their area of expertise.

5) It can be effortlessly  installed and available

An extraordinary aspect of SaaS is that it’s for the most part available and effectively introduced. Most stages furnish clients with convenient manuals and set-up guides just as contacts for client service.

also read -https://www.exhibit.tech/tech/a-comprehensive-guide-to-saas-software/

Android Smartphone Data Recovery Using DroidKit

Imagine you are using your smartphone. And, suddenly, there comes a technical snub due to which you lose all your contacts and data. What will be your first reaction? Well, there’s no way to blame Thomas Gabriel as that was a fictional character in Die Hard 4 (Live Free or Die Hard). So, before taking out your list of curses and slang languages, all you need is some resilient solutions or a way out through which you can restore and recover the lost data. A person claiming all these statements can get a tag of being insane from you, but hey, wait! It’s possible. If it’s Android Smartphone, you can stretch your legs and get back into your peace mode without taking any antidepressants pills. This Exhibit article is all about Android smartphone data recovery using iMobie’s DroidKit. 

Don’t let the serotonin in your body go down. Just download the DroidKit application and regain your lost data.

How can iMobie DroidKit recover lost data?

DroidKit is the last resort or automated external defibrillator for Android smartphone users that can even bring dead phones to life. DroidKit is a software application that scans your device and virtually connects to your smartphone. When it comes to data recovery, DroidKit has a solution named the Quick Recovery technique. Next, it tries to assess what could be the important data that you want to retrieve. Through this, there’s an assurance that you can get back 13 types of data. These data can be in the form of WhatsApp chat, pictures, phone contacts, messages, and many others. 

Step-by-Step Guide for Android Smartphone Data Recovery

  1. Through your PC, launch a web browser.
  2. On the address bar, click on the link – https://www.imobie.com/droidkit/.
  3. Select the Free Download option to download the DroidKit setup.
  4. Once downloaded, run the setup file for installation (ensure that an application icon gets created on the Desktop). 
  5. After the installation gets completed, double-click on the DroidKit icon to start the application.
  6. Connect your Android smartphone using a USB cable.
  7. After DroidKit finds your data, go to the menu section present on the left side of the application and select the option “Recover Lost Data” or “Extract Needed Data.”
  8. Give permissions that DroidKit asks for and let it make a recovery for you.

Benefits

The best part about iMobie’s DroidKit Android tool is that it does it in an organized manner when it starts extracting lost data. Hence, you don’t need to go for any kind of arrangement or ordered formation as it eases the entire process. DroidKit can help you retrieve data from crashed phones and SD cards that got formatted due to any mistake. So, if you just met an accident with your smartphone completely in a tarnished stage, don’t panic. Apart from this, DroidKit lets you have a deep recovery mode. This methodology is based on NO-DATA-LOSS technology, where there is a high success probability to regain lost data. So, next time if you want to go for Android smartphone data recovery, all you need is DroidKit.

What Is Lossless & Spatial Audio In Apple Music?

Audiophiles were excited when Apple announced its lossless audio option and industry-leading high-resolution sound quality to subscribers with the addition of Spatial Audio that support Dolby Atmos, but how many of us truly know about its actual definition and purpose? How much better is it than what you’re currently listening to? The answers are a little more involved.

Lossless Audio:

Music in modern times has often been all about innovation, and with every other launch, it offers sharper results. Apple has developed its own lossless audio compression technology called Apple Lossless Audio Codec (ALAC), which helps preserve every bit of the original audio file. 

The lossless format can compress the silences to almost zero space while maintaining all sound data as their name implies, making them smaller than uncompressed files and offers Apple Music subscribers the exact same thing that the artists created in the studio. The higher bitrate will help the digital audio file to sound more reliable and accurate. The bitrate of a standard lossless audio track is around 1,411 kbps which is more than four times the audio quality of an MP3 file with a bitrate of 320 kbps.

Lossless audio is available on the iPhone, iPad, Mac, and Apple TV 4K. The company will add an entire Apple Music catalogue of over 75 million tracks available in Lossless Audio by the end of 2021.

How to use Lossless Audio service on your iPhone or iPad:

  1. Go to Settings > Music
  2. Tap Audio Quality
  3. Tap Lossless to switch it on or off. You can choose the audio quality for streaming and downloading audio from here.
  • Choose Lossless for a maximum resolution of 24-bit/48 kHz
  • Choose Hi-Res Lossless for a maximum resolution of 24-bit/192 kHz

How to use Lossless Audio service on your Mac:

  1. Open the Apple Music app.
  2. Choose Music > Preferences.
  3. Click the Playback tab.
  4. Under Audio Quality, select or unselect Lossless to switch it on or off. You can also change the settings for streaming and downloading lossless from here.
  • Choose Lossless for a maximum resolution of 24-bit/48 kHz
  • Choose Hi-Res Lossless for a maximum resolution of 24-bit/192 kHz

Apple becomes the latest one to join the Lossless club along with companies like Spotify, Amazon, Tidal, Deezer, and Qobuz, who have already launched a lossless audio feature for their subscribers. Amazon Music HD offers its subscribers the experience to listen to “Ultra HD” (up to 24-bit/192kHz), while Tidal gives its HiFi subscribers the choice of listening to Master Quality Authenticated (MQA) certified tracks (up to 24-bit/96kHz).

Apple’s Spatial Audio:

Apple’s Spatial Audio was first introduced on its AirPods Pro earbuds in September 2020 with iOS 14 and has evolved tremendously over time. Recently, at WWDC, Apple brought Spatial Audio with support for Dolby Atmos to Apple Music and made its greatest advancement ever in sound quality as listening to a song in Dolby Atmos is like travelling to another world.

Spatial audio is a 360-degree sound format that takes 5.1, 7.1 and Dolby Atmos signals and virtualises them into directional audio filters that surround you, making it seem you are in the heart of the action. Spatial audio recreates the audio experience of a cinema and makes watching movies with Apple products more immersive. 

Apple Music and Dolby are making it easy for musicians, producers, and mix engineers to create songs in Dolby Atmos by transforming the boundary of music. Apple Music is also collaborating with artists and labels to add new releases and create music specifically for the Spatial Audio experience.

Currently, the service is supported in Apple TV 4K, Airpods & headphones with H1 or W1 chip and built-in speakers of the latest iPhone, iPad and Macs with M1 chips. However, Apple Music isn’t the first to introduce spatial audio service on Apple devices, as Tidal launched Atmos Music to Apple TV 4K back in May 2020.

How to listen to Dolby Atmos on your iPhone or iPad:

  1. Update your iPhone or iPad to iOS or iPadOS 14.6. 
  2. Go to Settings.
  3. Tap Music.
  4. Under Audio, tap Dolby Atmos. 
  5. Choose Automatic, Always-On, or turn Dolby Atmos off.

How to listen to Dolby Atmos on your Mac:

  1. Update your Mac to macOS 11.4.
  2. Open the Apple Music app.
  3. Choose Music > Preferences.
  4. Click the Playback tab. 
  5. Choose Automatic, Always-On, or turn Dolby Atmos off.

The company is also bringing the Spatial Audio experience to FaceTime, its video conferencing app. Apple’s Spatial audio feature is yet to be available for its headphones as Apple is still working on the technology needs that’ll support head tracking. Still, at the same time, Sony’s Reality Audio 360 is available on its own headphones and high-end speakers.

The Cupertino based company loves music and always tries to offer the latest innovations to its consumers. Once Apple revolutionised the music experience by putting a thousand songs in your pocket with the launch of the iPod and iTunes, and now they are taking your music experience to another world with Lossless & Spatial Audio.

How To Use Best of OnePlus 9R Features – Tips & Tricks

OnePlus launched the OnePlus 9R on 23rd March with their very own Oxygen OS, which is one of the most fluid and clean versions of Android skins available, and there are lots within it to look into and customise. OnePlus is also trying really hard in India after becoming the most popular premium brand in the country and the launch of India only features was one of these steps. If you’ve recently purchased OnePlus 9R, here are some valuable tips that will make your premium phone experience effortless and easier.

Customize your fingerprint animation:

People usually get bored with the same blue-coloured fingerprint animation, but now they don’t have to stick with just one fingerprint animation. OnePlus seized their problem and has added several fingerprint animations that let users unlock their handset in style.

You can now customize the traditional fingerprint animation that comes when you unlock the phone using the in-display fingerprint scanner. To do that, open Settings > Security & Lock Screen > Fingerprint Unlock. Here, you’ll see a Fingerprint Animation Effect in the fingerprint unlock option, such as ripple, stripe, and more. Choose the fingerprint animation option you want and lock your phone to unlock it with the new fingerprint.

Use photos as your Always on Display:

A maximum number of smartphones with the Always-on display feature show a black screen along with time, date and battery percentage. Moreover, it looks decent, but having a canvassed photo of yourself or your loved ones on the Always-on display has its pleasure. The OxygenOS 11 update brings this beta feature called Canvas which turns a person’s photo into your Always-on ambient display.

Once you lock your phone, a person’s face becomes a white outline on a black background. If you want to add such canvas on your OnePlus 9R, then Open Settings > Customisation > Wallpapers and select Canvas. Then choose a photo you want to see on your AOD, and the phone will activate the Canvas.

Work-Life Balance:

OnePlus 9R features a new notification prioritisation feature to help users achieve Work-Life Balance, which is quite innovative. The feature allows users and helps them prioritise notifications and assign time and allocate time wisely. One of the best features launched by OnePlus will help users achieve work-life balance while working from home during the Covid-19 pandemic.

The new Work-Life Balance feature by OnePlus takes a more condensed approach; by applying this feature, you can use the same phone differently, with different apps, mute notifications from certain apps, during the set work hours and free time. To activate, head to the quick toggle/settings panel and tap on Work mode or Life mode, and it’ll show you a list of all your installed apps, select the preferred apps and activate the feature.

Double-tap to lock: 

Android phones will instantly lock themselves once you stop the screen activity or turn the screen off with the power button, but a little problem arises when you have a giant phone, as you have to move your thumb and sometimes it makes you think, what if I have an option to lock the phone with other more straightforward options.

OnePlus has all ears to resolve your question, and with the OnePlus 9R, now you can lock your phone with just a double-tap on the empty space. To activate this feature, head to Home Settings > Double tap to lock, toggle the switch to the on position, then go back to your home screen again. Now, whenever you double-tap on your home screen, your phone will lock itself.

Bedtime Mode to slow wireless charging: 

Living in a modern world and busy times, most of us will forget to charge our device during the daytime and put the phone on charge during bedtime. Also, most of us prefer to chat or watch movies by plugging in the phone to charge during the night hours and fall asleep; this raises concern over battery optimization and overcharging the device. 

However, now we have a solution as OnePlus has launched the first wireless charger, and it’s a beauty. So, If you’re using one of OnePlus’ fast wireless charging stands with your OnePlus 9R, you can enable bedtime charging mode. The feature switches the whirring fan off and charges the phone more slowly at specific times, taking away the wireless charger’s bothersome fan noise. To activate the same, go to Settings > Battery > Bedtime Mode > Tap next to schedule to turn on the Bedtime Mode and schedule the time; that’s it.

Direct WiFi tethering:

Back in 2014, if somebody has asked you, is it possible to connect to a WiFi network and share that WiFi connection via a mobile hotspot simultaneously? You would have answered a straight no, but now with OnePlus, it is possible.

Sharing a connection this way is called Direct WiFi tethering, where you just have to connect your phone with WiFi and then you can share the same network to any other device by turning on a mobile hotspot. The feature is useful when you don’t want to share your home-based WiFi password with others, and it also sounds cool to activate WiFi and hotspot at the same time.

Horizon Lighting or Edge Lighting:

A direct notification and a blinking light notification are ice age features. OnePlus has introduced something unique with Horizon Light notifications. The horizon lighting feature lights up the edges of the screen via a flashing light when you receive an alert or a message instead of sending you a push notification.

A practical and helpful feature replaces the LED for notifications, an element that often does not find space in the most recently launched devices. If you want to enable horizon light for notification on your OnePlus 9R, then head to Settings > Display, turn on the Ambient Display and scroll down to tap on Horizon Light. Select one of the lighting effects out of four available options as per your choice and save it to apply the feature.

Do This Before Google Photos Becomes Paid

Last year during November, Google announced a modification in its storage policy for Photos and confirmed that it would be ending support for unlimited storage of high-quality images for their users. As per the new policy, the 15GB free storage that comes with every Google account will also include Google Photos, which really annoyed people as it was one of the best features. After 1st June, users will be limited to the 15GB free Google storage that the company allows for all accounts, divided across Photos, Gmail and Drive storage. 

Google has also confirmed that future Pixel phones won’t get the same perks as they currently have, where they’re allowed to store unlimited original quality pictures in its Photos app. The current Pixel owners (Pixel 5 and earlier models up to Pixel 2) will be the last to enjoy Google Photo’s best feature.

Now, for those without an eligible Pixel smartphone, you’ve only got a few days left to do the action because after the policy comes into effect, users will be bound to a limit of 15 GB, and if they want additional storage, they have to opt for Google’s subscription-based storage plans that start from Rs 130 per month for 100GB storage or delete some photos for some extra space. Nevertheless, suppose you don’t want to spend extra money on cloud storage. In that case, you should spare the time now to clear unwanted data and upload important images-videos you haven’t put on Google’s cloud before the deadline kicks in.

Why is Google changing the storage policy?

Cloud storage doesn’t just appear out of the clouds, and free backups are costing big to Google as the more data people store on Google Photos, the more hard drives worth millions of dollars shoot in the Google backup storage system. Along with hard drives, the company has to make the payment to keep the data safe and secure in storage buildings which also costs tons of electricity charges and wages of workers. 

According to Google, there are more than four trillion photos in its cloud storage and over 1 billion users backup their 28 billion photos and videos to Google Photos each week. An authorised Google person also said that 80% of users would not hit the primary 15 GB storage mark in the next ten years after the policy comes on board.

How to clear up unwanted data?

You must have cared about cleaning your surroundings during the pandemic, but now, you have to apply the same as it’s time to clean your digital room and to do that, you will need the Google One app. In the app, open the storage tab, and you will be able to see how much of your free 15GB storage is utilised across your Gmail, Google Drive files and Google Photos data. 

If you want to clear up unwanted data, tap on the ‘Free up account storage’ button, and you’ll see all the usage details, including draft-discarded emails, emails with large attachments, and unsupported file types on Google Drive and more. Take a fresh look at your Google Photos library and remove all unwanted, duplicate and blurred images. You can either select the categories you want to get rid of or select each item manually, whichever is suitable for you.

How to use most of the Google Photos app before 1st June?

Now that you’ve cleared all the unwanted data, it’s time to back up the rest and upload the new high-quality images. You can add as many high-quality photos as you want to Google Photos before 1st June as it won’t impact your Google account storage. If you haven’t converted your original quality images to high quality, it’s time to do the same to ensure it is not counted in your 15GB free storage.

In case if you’ve too much data and use a phone with ample internal storage capacity (256GB or 512 GB), then download all the data on your phone before the deadline. After finishing the download process, create a new Gmail account, just for the photos and upload all the data, pictures, and videos folder-wise to the newly created account’s Google Photos. By following this process, you don’t have to worry about running out of storage due to Gmail and Google Drive files, as it’s null already. Apple iPhone users can move their data to iCloud with a 75 per month plan, which offers 50GB storage.

Other alternative cloud storage options:

DigiBoxx, India’s very own cloud storage platform, offers 20GB of free cloud storage. The free plan supports Gmail integration and unlimited external collaborations, along with end-to-encryption. DigiBoxx is offering 100GB of cloud storage space per month for just Rs 30, which is pocket friendly for everyone.

Along with Digiboxx, there are several other storage providers available in the Indian app market, including Microsoft OneDrive, Degoo, and yet to be launched Amazon Photos, but all of them are offering a limited storage space, which is even shorter than Google Photos. Then why not use our very own and trustworthy Google Photos instead of others.

How To Use Your iPhone To The Fullest – Tips & Tricks

Everyone likes to do things in a nick of a time unless you fancy following a snail lifestyle. Grasping a handful of tips and tricks will always help you save your time and do things quickly. Coming back to the actual point, if you’re a proud owner of the iPhone or if you’ve recently purchased an iPhone with the latest iOS 14 software downloaded, this feature is for you as we’re presenting the best hands-on iPhone tips and tricks to make your day to day life more effortless than ever.

Customize your pre-written default text messages:

Nowadays, due to the pandemic, most people are looking for excuses to fill their extra time, and that’s the only reason your random classmate called you last week but are you really interested in receiving his/her annoying calls again? If no, here’s a tip for you. Instead of completely ignoring your classmates or family members, the best you can do is reply to them with a customized text message. 

Every iPhone has three pre-written options: Sorry, I can’t talk right now, I’m on my way, and Can I call you later? And an option that lets you type your text. But if you want them to know you’re really busy, just overwrite the other three options with something interesting so that people will assume you’re busy-busy somewhere else.

To overwrite those three options, follow these steps:

  1. Open the Settings app on your iPhone
  2. Scroll down and tap phone
  3. Tap Respond with Text
  4. Pick the option you want to edit
  5. Type in new text, done

Edit Screenshots in a smart way:

People often share screenshots with their loved ones, friends or colleagues, sometimes for a fun purpose and sometimes for work but do you know you can edit your screenshot right before you save or share it?

To edit your screenshots, follow these steps:

  1. Take a screenshot
  2. Tap on the thumbnail of the screenshot that appears at the bottom left of your screen
  3. Now crop your screenshot, doodle on it, add highlight parts, and even more.
  4. When you’re done editing the screenshot, tap on the done option, or tap the share icon to share it with someone.

Avoid getting ducked by your phone with Alternative Face ID:

You spend almost half of your day with your mobile; still, most of the time, your device fails to recognize your face just because you’ve clean shaved your beard or you’ve changed your hairstyle and look for an evening party. No one likes to get duck by their phones, and after several attempts, it gets annoying and gets you down after a while, but what if I tell you there’s a solution to get over such an issue right in your iPhone.

To add an alternative face ID, follow these steps:

  1. Open the Settings app on your iPhone
  2. Scroll down and tap Face ID & Passcode
  3. Enter you password
  4. Select Set Up an Alternative Appearance
  5. Tap on get started and follow the instructions
  6. Scan your alternative appearance, done

Cut down unwanted notifications:

A single undesired notification can ruin your evening date, family time or a business meeting, and we all know getting your concentration back on something is a complicated task. In such cases, the Do Not Disturb feature can be your saviour; it is one of the most-used features on the iPhone, but do you know there’s more to explore with this feature, especially when you do long commutes. While driving, staying focused is necessary, and if in such situations you get a call or notification, it will divide your focus in two. To avoid such scenarios, turn on Do not disturb while driving; this feature will help your iPhone detect acceleration, and it will automatically connect to your vehicle’s Bluetooth. It will also send an auto-reply text to anyone who tries to contact you.

To turn on this feature, follow these steps:

  1. Open the Settings app on your iPhone
  2. Tap on Do Not Disturb 
  3. Select Do not disturb while driving
  4. Choose automatically or while connected, done

Speed up your iPhone’s charging:

We all know iPhones are marvels of manufacturing, but their batteries can degrade over time. Turning on aeroplane mode while plugging in your iPhone to charge is an old trick; along with this one, you can turn on the battery optimizer if you find your battery is beginning to degrade.

To turn on this feature, follow these steps:

  1. Open the Settings app on your iPhone
  2. Tap on Battery 
  3. Select Battery Health 
  4. Choose Optimise Battery Charging, done

Scan QR codes in a second:

Every time you want to scan some sort of QR code or make the payment online at a local store, you look for a QR scanner or some specific payment app, and during peak hours, it really gets to your nerves. In such urgent situations, iPhone’s inbuilt QR scanner can help you toss the issue. If you want to launch the phone’s inbuilt QR code scanning feature in seconds, launch Control Centre by swiping down from the top right of the screen. Here, you’ll see the small QR code button. Tap on that, and now you can quickly scan a code.

Create Shortcuts for Emoji:

Whenever you’re chatting with someone, we all like to give quick replies and most of the time; we prefer to use emojis to express our feelings in a fast way, but finding emojis in seconds is a tricky task if you’re not aware of their exact placement in your keyboard. To make emojis easier to find, you can create text shortcuts for them just by typing a specific text. For instance, you can put LOL as the shortcut for the face with tears of joy and then every time you type LOL, this particular emoji will appear on a screen.

To set shortcuts for emojis, follow these steps:

  1. Open the Settings app on your iPhone
  2. Tap on General
  3. Select Keyboard > Text Replacement
  4. Tap on the + icon at the top-right

Close all the browser tabs in one go:

We don’t comprehend how many browsing tabs we’ve opened while looking for something on the internet, which leads to the opening of the way to many tabs, which later on breeds draining your battery. Luckily, the iPhone has a feature to close all the tabs in one go; you just have to scroll down on the tabs button at the bottom-right. Then you’ll see two options there, New tab and Close X tabs; choose the one you want. In addition to that, you can set it to close your tabs after one day, week, month, or leave it on manual mode.

Control your screen time usage:

We often use our iPhones to the fullest and then feel guilty about that, but the iPhone has taken care of that. When you can’t minimize or control your phone usage, you can quickly chop off the time you spent on social media, online shopping, or scanning headlines with the help of Screen Time. 

To enable screen time, follow these steps:

  1. Open the Settings app on your iPhone
  2. Tap on Screen Time
  3. Select App Limits and then Add Limit
  4. Tap a category and add the time
  5. Tap the Top Left Arrow to Save, done.

How To Grow Your Personal Brand On Instagram?

Are you on Instagram? Of course, you are. Instagram has more than 1.2 billion users worldwide, and that’s nearly 15% of the whole planet’s population. Such a vast audience, right? Amongst all these Instagrammers, 95% of them use the platform as a time-killing app, but have you ever thought that this one app can help you build a promising career?

If you’re in a field that benefits from having an audience, especially if you’re into a creative field like photography, modelling, fitness, cooking, etc, your Instagram feed can become your modern-day portfolio. Instagram is a rapidly growing platform that you cannot ignore as it helps you influence worldwide and gives you the freedom to do something that you always wanted. But how can one grow as a personal brand? Take a deep breath, sit back, and I’ll guide you in brief.

Username:

You only have a few seconds to make a good impression, so knock it off and make a good one. The first thing people will notice is your username, so keep it as short and simple as possible. As you’re a personal brand, it’s a great idea to use your real name, or you can personalize an attractive name that will suit your feed and profession. Whatever it is but don’t complicate your username with any unnecessary symbols or numbers; it’ll help you stand out. Mention what you are, where you are from, and what’s your profession in bio, but in a decent and short text, don’t overdo it, and keep changing over time.

Know Your Audience:

In a world where social media matters more than anything, having the right audience is the key to success. It’s important how you connect with them visually; you have to be clear about what you’re going to add to their daily feed. If you’re into a creative field, then create a specific tone-vibe and use relatable but interesting captions to bring them to you as at the end of the day, they’re going to remember you by your work. The same applies to the rest of the fields; know your audience, know what they’re looking for and create your page accordingly.

Instagram Aesthetic:

What kind of difference do you notice when you visit your favourite Influencers feed and a regular Instagrammer’s feed? Yes, what you’re thinking is absolutely right, the aesthetics, the way they’ve composed their pictures. A well planned Instagram feed can visually convey brands in a second, as it shows how professional and passionate you’re about your work. You can learn how to set the aesthetic just by visiting your favourite profiles, are they bright and lively, or are they following some patterns? Note such things down and decide which one is suitable for you. These little things will not only give you a decent account but also helps you in building a fanbase. If you want to stay ahead of the game, then pre-plan your feed with Later’s Visual Instagram Planner because staying organized is always a great option.

Creative Editing:

The film is made in the editing room, so the Instagram feed. The essence of every art is editing, and learning it is like adding one more feather of art to your portfolio. Adopting the same or set of filters and following the same editing rules will help you keep your photos looking consistent. Adobe Lightroom, Snapseed and VSCO are the most helpful and must learn apps if you plan to level up your Instagram photos and work on aesthetics.

Amongst these, Snapseed and VSCO are pretty easy to use; if you’re looking to edit your images in less than three-four taps, then these two are best, but if you want a more professional look for your pictures, then I would recommend Adobe Lightroom, by far one of the most powerful photo editing tools out there. Also, keep these things in mind while editing your photos on an app, the temperature, brightness, and contrast, maintain these things to keep your feed consistent.

Replying to Comments:

If you have thousands of followers, then it’s not humanly possible to reply to each of them, but if you’re just started or into a developing phase, this will work great. Just a simple thanks will work wonders, even if they’re trolling you.

Hashtags:

Your personal brand is the intention behind your outward-facing interactions with the world, and you might think that with aesthetics and creative editing, you can create a decent fanbase, but what about a worldwide reach? Well, a hashtag is an answer to that. Research on what your fellow Instagrammers are hashtagging, create your hashtag to get noticed quickly, appeal to your audience about using the same hashtags, and add tagged picture stories to make them happy; these little interactions will help you go beyond the boundaries. If you’re looking for a hashtag generator, use Tailwind’s Hashtag Finder, the site will help you with the best hashtags to use for Instagram. Also, if you’re posting some brand-related content, even if it’s non-sponsored, don’t forget to tag the brands; who knows, they might feature or repost you in their next post.

With all these tips, you can have a fair head start over your competition, so don’t wait for the right day; go on, seize the opportunity.

How To Keep Your Gadget From Overheating

Overusing and wrongly handling your gadgets can lead to overheating, among other problems. While it might be worrisome, you need not be too hassled. Here are some quick tips that you can employ to keep your gadgets from heating. And, you’re welcome-

  1. Charge your device, particularly your phone, on a hard surface and not on softer surfaces like a sofa or a bed that tend to absorb the heat emitted and block the air vent thus making the phone even hotter

  2. Kills all the apps running in the background so as to reduce the workload on the device

  3. Get rid of the cover every once in a while so your phone can breathe and cools down on its own

  4. Clean the vents so the heat has a way out and does not get trapped inside the phone

  5. Avoid extreme temperature changes, i.e. if you have been in sunlight, wait to use your phone when you come indoors into a cooler environment

  6. Never charge your phones overnight because not only does it spoil the efficiency of the battery in the long run, but it also tends to heat the phone up; it might also cause it to explode

  7. Shut down your laptop at night and keep it on the standby mode when not in use during the course of the day. This will not only reduce power usage but also reduce the heat output

  8. Shutting down your phones for a fix period during the day also tends to be healthy for the phone

What to Do When You Spill a Drink on Your Laptop

If you have spilled a drink on your laptop, then you are probably frantically reading this from a panic filled state. But don’t worry, it may not be as catastrophic as you might think. Whether you placed your drink down too close to your laptop or just had a clumsy moment, you are probably cursing yourself while trying to desperately think of a way to save your precious laptop and all the information it contains. It is important that you act quickly, so while you are reading this article, be sure to follow these steps along the way. Here is some helpful advice on what to do straight after spilling a drink on your laptop to limit the damage, as well as how to try and retrieve any at-risk information.

TURN THE LAPTOP OFF

Firstly, it is important that you don’t panic, so if you are panicking right now; calm down! You need to unplug your laptop from any power source straight away and then hold the power button down to ensure that the device is completely turned off. You shouldn’t waste precious time by trying to go through the shutdown procedure on the laptop. It is important that you turn the laptop off as soon the spillage occurs as otherwise it could cause a fatal short circuit, leaving your device damaged permanently.

REMOVE THE BATTERY

Now, the next step entirely depends on what sort of laptop you have. If possible, remove the battery from the laptop. While some devices allow you to easily remove the battery through a small latch, others require you to unscrew the back panel in order to access it. It is important that any source of power is removed from the laptop before you start the cleanup process, so be sure to remove any extra devices such as USB drives.

REMOVE EXCESS LIQUID

Once your laptop is shut down and removed from any form of power source, you should take a dry cloth and wipe away any liquid that remains on the device. Be sure to particularly focus on the ports and keyboard areas of the laptop. You should turn the laptop upside to drain any of the liquid that you can’t see. Ideally you should aim to leave it drying for around 24 hours as, even if it seems dry to you, it will likely still be damp in hidden areas.

START THE RECOVERY PROCESS

If you have followed the above instructions, but your laptop is beyond repair, then there are still ways that you can get back the information that is stored on your device. Industry leaders, such as Secure Data Recovery offer hard drive recovery services for laptops that have failed due to liquid damage. Spilling a drink on your laptop can easily feel like the end of the world, but by acting quickly and drafting in the help of a recovery service, it may not be as bad as you anticipated.

Exit mobile version